Assess Your Site and Gather Essential Information
Begin by conducting a thorough soil analysis at your intended footing location. Dig test holes approximately 18 to 24 inches deep at several points across the site to examine soil composition and consistency. Clay-heavy soil dominates much of the Powder Springs area, and this dense material can retain moisture and expand during wet periods, potentially compromising footing stability if drainage is inadequate. Document the color, texture, and moisture level of soil samples from each test location to identify variations across your site.
Evaluate natural drainage patterns by observing where water flows during and after rainfall. Walk the property during a storm or immediately following one to identify low spots, standing water, and natural channels. Note the slope direction and grade percentage, as footings placed in areas with poor drainage or excessive slope require additional excavation and grading work. The region experiences periods of heavy rainfall, particularly during spring and late summer, making proper drainage assessment critical for longevity.
Check underground utilities before any excavation. Contact local utility locating services to mark gas lines, water mains, electrical conduits, and communication cables. Verify property boundaries and setback requirements with your local building department, as Powder Springs building codes mandate specific distances from property lines for foundation elements. Measure and mark the exact footing dimensions using stakes and builder’s string, ensuring square corners by applying the 3-4-5 triangle method or using a construction laser level.
Document existing site conditions with photographs and written notes, including nearby structures, trees with root systems that might interfere, and any visible soil erosion or settling. This assessment phase establishes the foundation for every subsequent step, preventing costly errors and ensuring your footing will provide stable, lasting support for the structure above.
Prepare the Footing Trench with Precision
Excavate your trench to the depth specified by your structural plans and local building codes. North Georgia frost lines typically require footing depths of at least 12 inches below finished grade, though many contractors excavate to 18 or 24 inches for added stability in clay soils. Use a trenching spade or a compact excavator for larger projects, maintaining vertical or slightly sloped walls to prevent soil collapse during the pour. Measure depth at multiple points along the entire trench length using a story pole or tape measure to ensure consistency.
Width specifications depend on the load your footing will support, but residential footings commonly measure 16 to 20 inches wide for standard walls and 24 to 30 inches for heavier structural loads. Mark your desired width using chalk or spray paint before excavating, and verify measurements frequently as you dig. Remove all loose soil, organic material, roots, and debris from the trench bottom, as any soft spots or voids will compromise bearing capacity and lead to differential settling.
Compact the trench bottom using a hand tamper for narrow trenches or a plate compactor for wider footings. Apply firm, overlapping passes across the entire base until the soil resists further compression and no visible footprints remain when you walk across it. In areas where clay content is high, slightly dampen extremely dry soil before compacting to improve density, but avoid oversaturation that creates mud. Verify the bottom is level by setting a long straightedge or laser level across the trench width, adjusting high spots by scraping and low spots by adding and compacting granular fill material.
Install a layer of crushed stone or gravel, typically 3 to 4 inches deep, if your soil conditions include excessive moisture or poor drainage. Compact this base layer thoroughly before proceeding. Proper trench preparation directly determines how evenly your footing will bear loads and how effectively it will resist settling, cracking, and structural movement over decades of service.
Set Up Forms and Reinforcement Correctly
Select straight dimensional lumber for your forms, typically 2×8, 2×10, or 2×12 boards depending on your footing height. Inspect each board for warps, twists, or splits that could compromise form integrity during the pour. Cut boards to length, allowing for sufficient overlap at corners and joints. Position the forms along both sides of your trench, setting the top edge at your desired finished footing height. Drive sturdy wooden or steel stakes into the ground on the outside face of each form board, spacing them 3 to 4 feet apart for residential footings and closer for taller or longer pours.
Secure forms to stakes using duplex nails or deck screws, fastening through the stake into the form board. Double-check alignment by stretching a string line along the top edge of the forms, adjusting stakes and boards until the entire run is straight. Use a 4-foot or 6-foot level to verify that form tops are level across the width and along the length. Install cross braces between opposite forms if the trench is narrow enough, or use spreader blocks cut to the exact footing width to maintain consistent spacing during concrete placement.
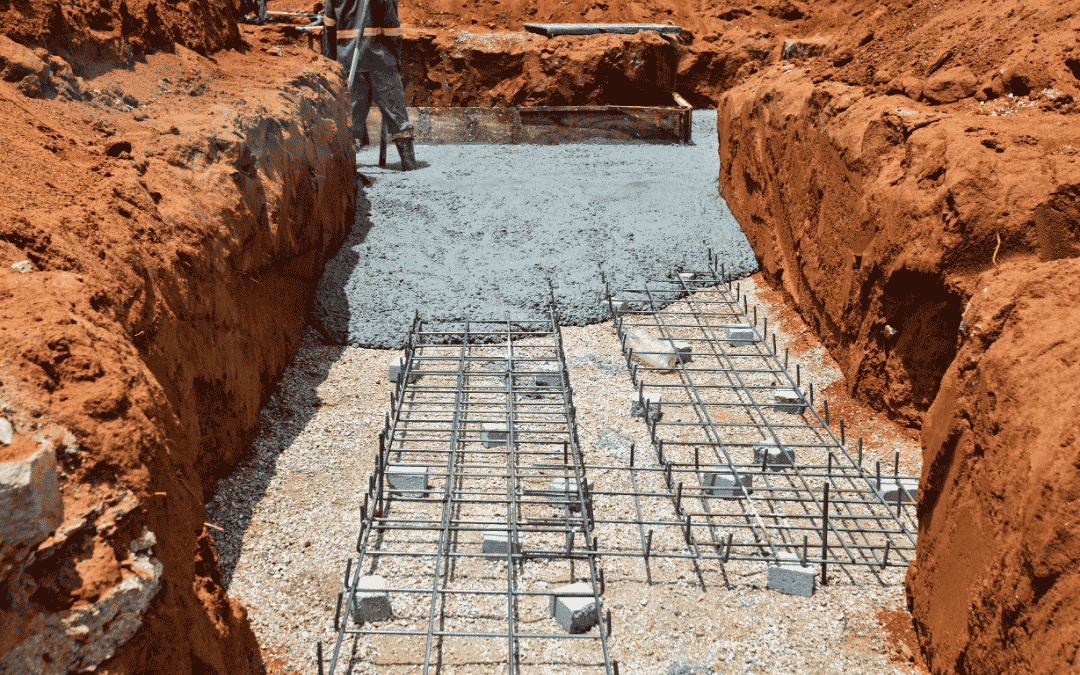
Position steel reinforcement according to your structural specifications. For typical residential footings, place two continuous lengths of #4 rebar running parallel along the length of the footing, positioned approximately one-third of the footing height from the bottom and spaced evenly across the width. Support rebar on plastic or concrete chairs, ensuring at least 3 inches of clear cover from the trench bottom and sides. Overlap rebar ends by at least 18 inches where sections meet, tying joints securely with steel wire. Building codes in the Powder Springs area align with Georgia state standards, which require proper reinforcement placement and adequate concrete cover to prevent corrosion and ensure structural performance.
Verify that all reinforcement is clean, free of rust scale, oil, or coatings that might prevent proper bonding with concrete. Check that no rebar touches the forms directly, maintaining the specified cover distance on all sides. Correct form setup and reinforcement placement ensure your footing will distribute loads evenly and resist cracking throughout its service life.
Mix, Place, and Finish Concrete to Specification
Specify a concrete mix design appropriate for footing applications, typically a 3000 to 4000 psi compressive strength mix for residential projects. Confirm with your ready-mix supplier that the mix includes the correct water-cement ratio, aggregate size, and air entrainment appropriate for exterior below-grade applications in Georgia’s climate. Air-entrained concrete improves freeze-thaw resistance, which matters during occasional winter cold snaps in the region. Schedule your concrete delivery to arrive when you are fully prepared, as once placement begins you must work continuously until the pour is complete.
Begin placement at one end of the footing, discharging concrete directly into forms or using wheelbarrows and chutes for areas the truck cannot reach. Pour in layers no more than 12 to 18 inches deep if your footing height exceeds that depth, consolidating each layer before adding the next. Consolidate concrete immediately after placement by working a concrete vibrator vertically into the mix at intervals of 18 to 24 inches, penetrating into the previous layer if working in lifts. Avoid over-vibrating, which can cause segregation and weaken the mix. Hand-spade along the inside faces of forms to eliminate voids and ensure complete contact between concrete and reinforcement.
Screed the top surface as you progress, using a straight 2×4 or magnesium screed board resting on the form tops. Work the screed in a sawing motion while advancing along the footing length, filling low spots and removing excess material. This creates a level surface at the exact height of your forms. After screeding, allow the concrete to stiffen slightly, then smooth the surface with a wood or magnesium float, working in overlapping passes to create a uniform, dense finish.
Monitor weather conditions throughout placement. Powder Springs summers can push temperatures above 90°F, accelerating setting time and increasing the risk of rapid moisture loss. In hot weather, schedule pours for early morning, use cooler mix water, and have curing materials ready immediately. Cooler months extend working time but slow strength gain, requiring extended protection periods. Timing your pour and applying proper finishing techniques directly influence how well your footing will perform under load for decades to come.
Monitor Curing and Protect Your Completed Footing
Begin curing immediately after finishing by covering the footing surface with plastic sheeting, wet burlap, or applying a liquid membrane curing compound. Proper curing maintains adequate moisture and temperature in the concrete, allowing the chemical hydration process to continue and strength to develop fully. If using plastic sheeting, overlap edges by at least 12 inches and weight or stake down all sides to prevent wind displacement. For wet curing, saturate burlap thoroughly and keep it continuously damp by misting with water multiple times daily, especially during Georgia’s hot summer months when evaporation rates are high.
Monitor moisture levels throughout the curing period. Concrete should remain damp to the touch for at least seven days, with many engineers recommending continued curing through 14 days for maximum strength development. If heavy rain is forecast, ensure plastic sheeting is secured to prevent washout on freshly placed concrete, but do not remove coverings entirely as consistent moisture is beneficial. During periods of high heat and low humidity common in Powder Springs during July and August, increase misting frequency or add additional layers of wet burlap to slow evaporation.
Protect the footing from physical damage and premature loading. Restrict foot traffic for at least 24 hours and avoid placing construction materials or equipment on the footing until adequate strength has developed. Concrete typically reaches approximately 70 percent of its design strength after seven days and full design strength at 28 days under normal curing conditions. However, cooler temperatures during late fall and winter months can extend these timelines, while summer heat may accelerate early strength gain but increase the risk of surface cracking if moisture is not maintained.
Remove forms carefully after three to seven days, depending on ambient conditions and project requirements. Inspect the footing surface for honeycombing, voids, or cracking. Minor surface imperfections can often be patched, but significant defects may require evaluation by a qualified contractor. Proper curing and protection during this final phase are as critical as site preparation and placement, ensuring your footing will provide stable, durable support for the structure above. For larger or more involved projects, professional inspection and testing services verify that your footing meets all structural and code requirements before construction continues.